• Emergency roof tarping is a temporary solution to protect your home from water damage following a storm or unexpected roofing failure.
• Step-by-step guide on how to properly install a roof tarp, ensuring maximum coverage and secure attachment to withstand the elements until professional repairs can be made.
• Importance of considering professional help for long-term roofing solutions, offering safety, efficiency, and peace of mind.
Understanding Roof Damage Warning Signs
In the sultry summer heat of Metairie, your roof stands as the first line of defense against the elements. It’s important to know the signs of damage that may necessitate emergency actions like roof tarping. Dark spots or trails and sagging are immediate red flags, indicating water damage and potential leaks. Before you can address these issues, a thorough assessment is critical to understand the urgency and extent of the measures needed.
Preparing for Emergency Tarping
As the sunlight wanes and the risk of sudden summer storms increases, it’s essential to prepare for the possibility of roof damage. You might notice missing, cracked, or curled shingles, which are telltale signs that your roof integrity might be compromised. In some cases, the damage isn’t visible from the ground, and that’s where a safer, closer examination becomes fundamental to your home’s welfare.
When to Act on Roof Damage
Do not wait for water to drip into your living room before taking action; by then, the damage could grow exponentially more severe and costly. If you’ve spotted any of the aforementioned signs after a heavy storm, it’s time to consider emergency roof tarping as a temporary but essential solution. Remember, tarping is a stop-gap to prevent further interior and structural damage until permanent repairs can be made. Quick recognition and response to these warning signs can save you time and money in the long run and keep your home secure through the stormy season.
Gathering Materials and Getting Started
Before the process begins, acquiring the proper materials is imperative for effective emergency tarping. You’ll need a durable tarp that can withstand the weather of Metairie—a standard blue tarp is often sufficient and readily available. Alongside the tarp, equip yourself with sturdy wood strips for securing the edges, plus nails or screws suited to your roof’s material. This preparation is the foundation of successful roof tarping that ensures a temporary safeguard until professional help arrives.
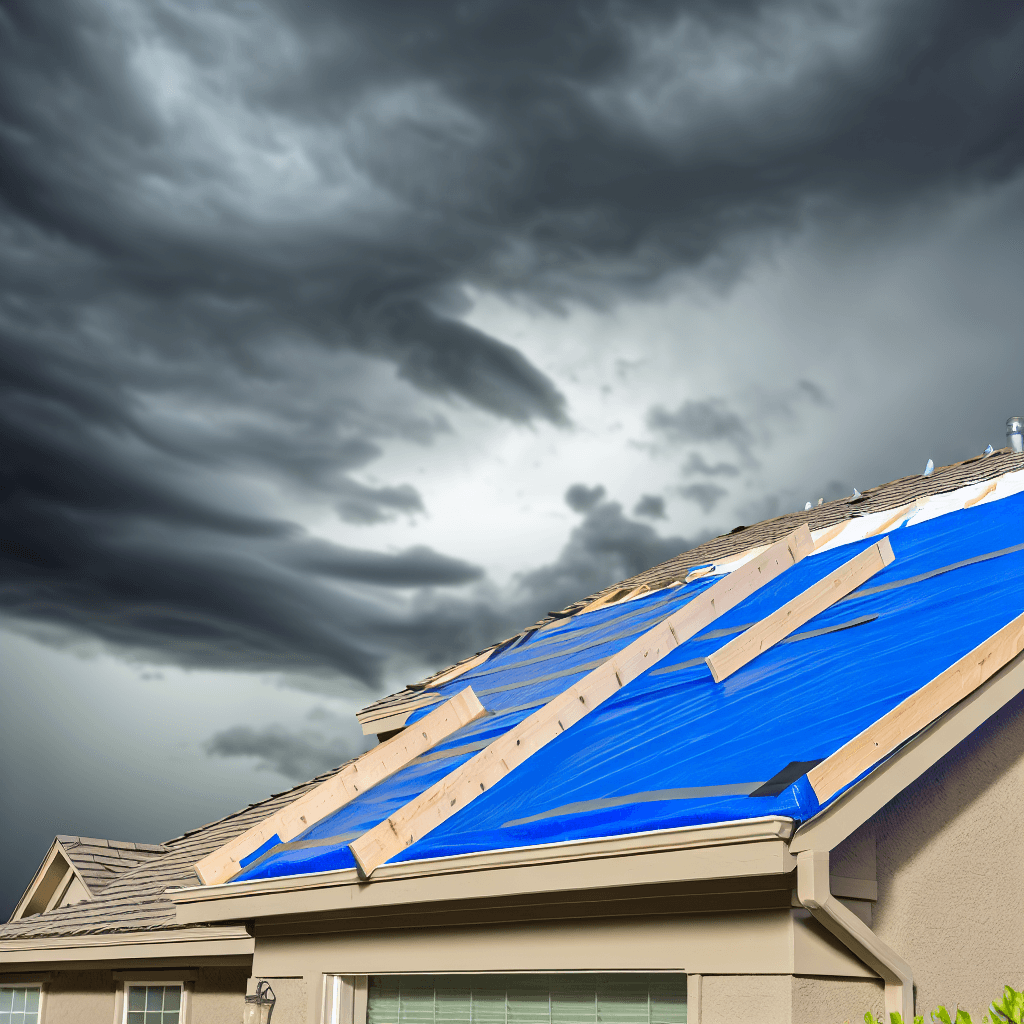
Initial Steps of Tarp Deployment
Initial tarp placement is crucial; it determines how well it will hold against the whims of nature. The tarp must extend several feet beyond the damaged area to prevent any leaks. Verify the tarp’s position by ensuring that all damaged sections are completely covered before securing it in place. This step is vital, as improper coverage can lead to further damage and costly repairs—something Peralta Renovations strives to help you avoid through thoughtful storm damage restoration services.
Step 1: Assess the Damage
Before you begin, it’s crucial to assess the extent of the damage to your roof. Look for any signs of wear or damage. This step is especially important after a storm has passed through Metairie during the summer months, when damage can be more extensive due to high winds and heavy rain.
Step 2: Gather Your Materials
You will need a few key supplies: a quality tarp, sufficient wood strips to secure the tarp’s edges (1x3s work well), nails or screws, a hammer or drill, and a ladder. Make sure to choose a tarp that’s large enough to cover the damaged area plus an additional 3-4 feet on each side.
Step 3: Secure the Perimeter
Using your ladder safely, climb to the roof and lay the tarp over the damaged area. Ensure that it lies flat and extends beyond the damage in all directions. Anchor the tarp by wrapping one edge around a 1×3 wood strip and nailing it down across the tarp’s perimeter.
Step 4: Smooth Out the Tarp
Pull the tarp tight over the damaged area to avoid any pooling water during rain. The tarp should be taut and secured at multiple points to prevent wind from lifting or damaging it further.
Step 5: Attach the Wood Strips
After the tarp is in position, nail or screw the wood strips along the edges of the tarp. This not only secures the tarp but also helps prevent water from seeping underneath.
Step 6: Seal the Edges
Inspect the edges of the tarp to make sure they are well-sealed against the roof. It helps prevent moisture from entering and causing additional damage to the roof structure.
Step 7: Check for Water Flow
Ensure the positioning of the tarp promotes water to flow off the roof and into the gutters. A tarp laid flat with no inclination can gather water, which may lead to further problems.
Step 8: Monitor the Tarp
After installation, keep an eye on the tarp, especially if there are more storms forecasted. A quick inspection after any significant weather event will ensure the tarp holds up and continues to protect your roof until permanent repairs can be made.
Common Mistakes to Avoid During Emergency Roof Tarping
When it comes to emergency roof tarping, even a small oversight can lead to bigger issues down the line. Many DIY enthusiasts in Metairie can attest to the challenges posed by the high winds and heavy rain during the summer months. To ensure your home stays protected until professional repairs can be made, steer clear of these common mistakes.
Mistake 1: Neglecting to Assess the Full Extent of Damage
Often, homeowners quickly cover the most visible damage without thoroughly inspecting the entire roof. This can result in missed areas that leave parts of your home vulnerable. To prevent this, meticulously check the entire surface for any signs of damage or wear.
Mistake 2: Choosing the Wrong Size Tarp
Selecting a tarp that’s too small is a frequent misstep; it will not cover the damaged area adequately. Always opt for a tarp that extends several feet beyond the damaged spot to ensure comprehensive coverage and protection from the elements.
Mistake 3: Improperly Securing the Tarp’s Edges
Failure to properly anchor the tarp’s edges can lead to the wind lifting or damaging the material. Make sure to firmly attach the tarp with wood strips around its entire perimeter, providing a secure hold even in strong winds.
Mistake 4: Not Smoothing Out the Tarp Completely
A loosely laid tarp can collect water and subsequently cause more damage. Pull the tarp taut to prevent pooling and secure it at multiple points to guarantee it is smooth and flat against the roof.
Mistake 5: Inadequate Sealing of Edges
Forgoing a thorough seal along the tarp’s edges leaves room for water and moisture to seep into your home. After attaching the wood strips, inspect the edges and apply adequate pressure to seal the tarp against your roof’s structure.
Mistake 6: Not Monitoring Tarp Post-Installation
Many assume that once the tarp is installed, it does not need to be checked again. Continuous monitoring, especially after storms, is critical to ensure the tarp remains effective and provides the necessary protection until a permanent fix is in place.
Securing the Tarp Correctly
Once your tarp is smoothly laid out, it’s time to secure it against the potential high winds Metairie can experience. Wrapping one edge around a wood strip and nailing it down creates a strong anchor that can withstand the elements. Repeat this step around the entire perimeter to ensure the tarp stays in place even in the harshest weather conditions.
Maintaining Safety and Efficacy
After installation, double-check every edge to ensure your tarp is properly sealed and anchored. This not only minimizes the risk of water damage but also keeps you from frequent adjustments. For added peace of mind and professional guidance, don’t hesitate to reach out to Peralta Renovations for expert assistance with your residential roofing needs.